Introduced with LumenVox 14.1 was a new Diagnostics page for the Dashboard. This page allows users to perform a series of Diagnostic tests as well as check the configuration of the LumenVox services on the system along with a number of other options.
This functionality is designed to give users a simple way of checking whether their LumenVox configuration is correct or not, and should be considered a first step when debugging an issue. This functionality greatly extends that offered by the lv_show_config utility that was introduced some time ago, yet offers an easy-to-use interface through the browser-based Dashboard.
System Diagnostics Controls
At the top of the Diagnostics page are a number of icons, representing the various functions that are available to users.
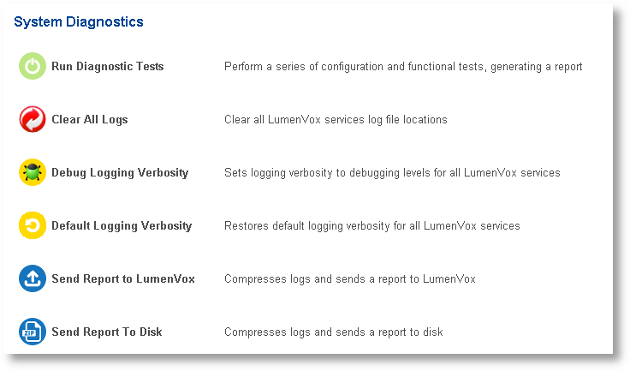
Each of these controls provides access to a different set of functionality as described below.
 |
Run Diagnostic Tests
|
The very first icon, when clicked, will initiate a complete set of diagnostic tests, including a check of the current configuration settings, and will generate a verbose Report, described below. This sequence may take a minute or two to complete, depending on your specific system configuration as well as which languages, voices and license types are installed.
This sequence of tests is designed to analyze the LumenVox installation and its settings to detect whether there are any configuration issues.
Network Connectivity Test
One of the first things that is checked will be network connectivity, which has often caused users various problems in the past.
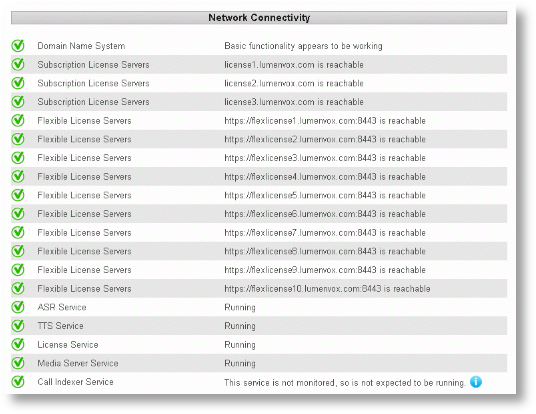
As you can see from the image shown above, a report of various network connectivity tests is shown, which checks for the systems ability to effectively communicate with a DNS server, capable of resolving Internet domain names (checking for a positive resolution of www.lumenvox.com), then a check to see if the LumenVox subscription license servers can be reached (whether your current configuration uses these or not) and then the LumenVox Flexible Licensing Nodes (again, whether you current configuration uses these or not).
Finally, connectivity is checked with each of the LumenVox Services, which are marked as "monitored" in the manager's configuration settings (in manager.conf).
Some of the above network connectivity tests may fail if you have firewalls or similar restrictions of such connectivity. This is fine, if this is what you expect, however the report should clearly show this so that there is no ambiguity should this connectivity be needed. In other words, if you expect some of this connectivity to be failing, then you can safely ignore these errors, but you should be aware of them nonetheless.
Configuration Check
Following the Network Connectivity tests, the Configuration Check will look at your current system configuration settings to see if there may be any potential issues you should be aware of. For example, if you have a specific license installed and available, but the corresponding feature is not installed.
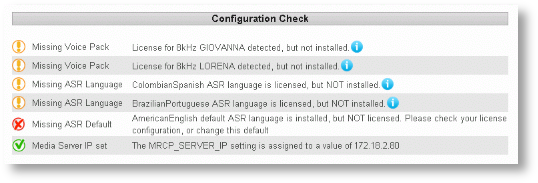
Issues showing up in the Configuration Check should be verified and any additional features installed as needed.
Note that the "Media Server IP set" check verifies that the configuration is not using the default "127.0.0.1" (loopback) IP address, since this is likely to cause connectivity problems if using MRCP, and has been the source of many installation problems.
Configuration Report
Next, the Configuration Report is generated.

The Report Summary at the bottom of the screen will then contain a detailed description of the configuration settings relating to all of the LumenVox services, based on their respective configuration files, as shown in the brief excerpt shown here:
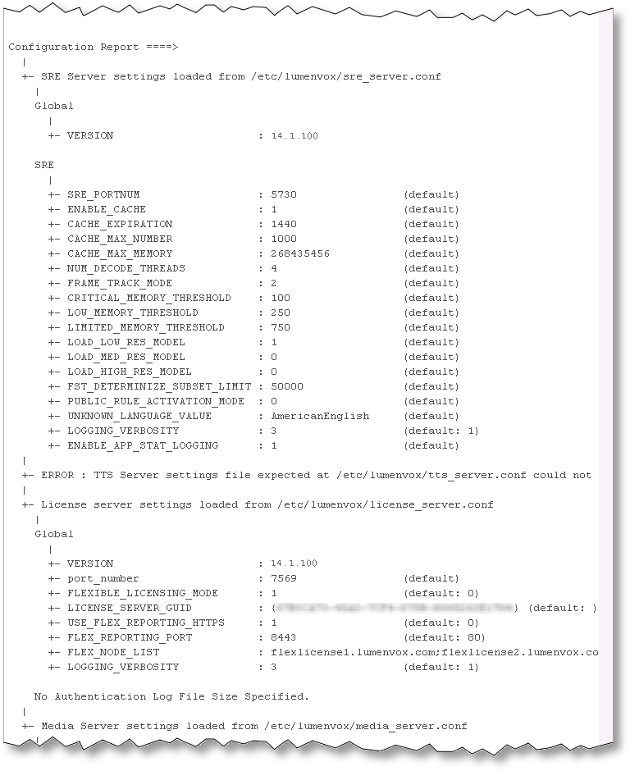
This report is very similar to the one generated by the lv_show_config utility, which was also updated during the 14.1 release, to now show the default setting if it is not currently active.
Functional Tests
Following the Configuration Report is the Functional Tests section, which will automatically run a sequence of tests, based on your current configuration and installed licenses to exercise the functionality of the LumenVox Services to verify they are working as expected.
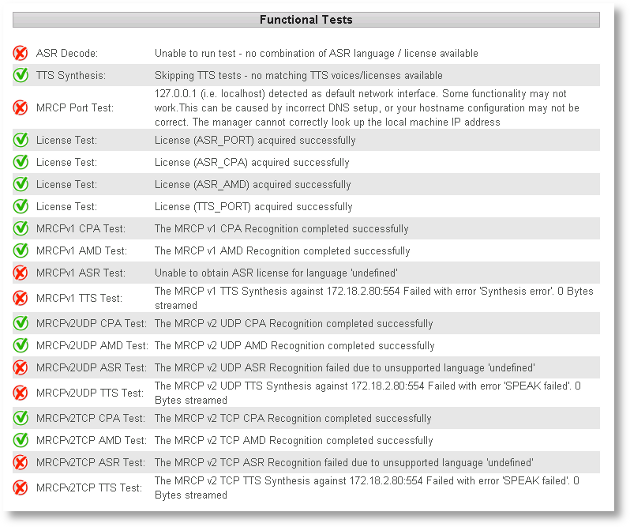
Any issues that are encountered during these tests will be displayed both in the main portion of the display as shown above, but also in the Report Summary at the bottom of the screen.
Important Note: While running these tests, the Dashboard will use various licenses to verify they are functioning correctly, so please ensure there are sufficient licenses to avoid disrupting any production traffic while you run these tests. Once each of these tests is completed, the license will be released, allowing it to be once-again used for production as needed.
Report Summary
Finally, at the bottom of the screen is the Report Summary, which contains a variety of information, including the machine specifications as well as a summary of all of the above tests (assuming they have been run).
This report summary is designed to allow you, as well as LumenVox engineers, to see the various settings of your system in enough detail to be able to determine if there are any configuration, installation or functional issues that affect the systems performance.
Notifications
Note that while running the above diagnostic tests, or other options on the Diagnostics page, you will see various notification and progress messages appearing in the top right region of your browser.
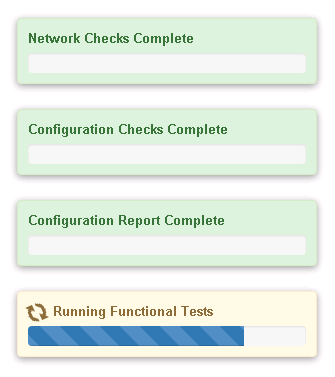
Many of these notification will automatically disappear after a period of time.
 |
Clear All Logs
|
The second icon shown at the top of the page is Clear All Logs. Once selected, a verification message will appear in the top right corner asking whether to proceed with this action.
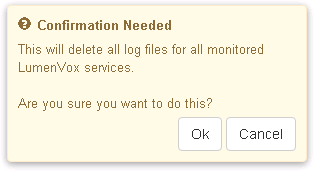
This is a very useful function and allows users to quickly clear all of the logs associated with the LumenVox services in an easy, convenient way. This is often useful if you are trying to collect log information to send to LumenVox, since older log messages may not help, and often significantly increases the amount of data being sent to LumenVox while diagnosing problems. For instance, it may be useful to clear all of these LumenVox logs prior to replicating a specific problem, or running Diagnostic Tests.
Note that clearing logs has no impact on production performance, so should not create any problems to ongoing production traffic on the system.
It is also worth mentioning that clearing these logs may also remove any specific problem that may have been logged earlier that you are trying to report to LumenVox, so care is needed when selecting this option.
New in 15.0.100
New functionality introduced with LumenVox version 15.0 includes a feature which will automatically send all current configuration settings to the corresponding service restart logs after logs are cleared using this option. This can be quite useful to record the current configuration settings when debugging any specific issues.
 |
Debug Logging Verbosity
|
Many times when trying to diagnose a specific problem, or when working with LumenVox staff, it is necessary to increase the logging verbosity settings for the LumenVox services, since the default logging verbosity does not show enough detail to be able to see diagnostic messages. Once selected, a verification message will appear in the top right corner asking whether to proceed with this change.
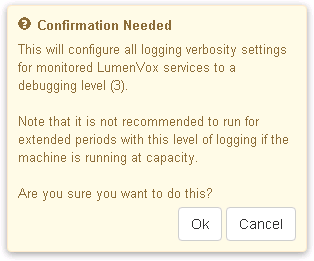
Prior to version 14.1, this meant going to each of the configuration settings files and manually changing these, then restarting the corresponding LumenVox services, or using the Dashboard interface to change these settings (without requiring service restarts), however starting with version 14.1 you can now use this option to force all of the LumenVox services to begin logging with verbosity 3, again without any of these services needing to be restarted - this saves a lot of time.
Important Note: When logging at debugging levels (3 and above), a lot more information is recorded in the LumenVox logs, which has a small impact on overall performance - we recommend not using this setting for longer periods than necessary if you are running a high channel count on machines that are nearing their performance limits (CPU, network, memory, etc.) to avoid degraded functionality.
Note that if services are already running at debug logging verbosity, selecting this option will have no effect.
 |
Default Logging Verbosity
|
When you have completed testing, or would simply like to return your logging verbosity to the default setting (1) for all LumenVox services, you can select this option at the top of the Diagnostics page.
Once selected, a verification message will appear in the top right corner asking whether to proceed with this change. After confirmation, all LumenVox services will be returned to their default logging verbosity (1) without needing to restart any of these services.
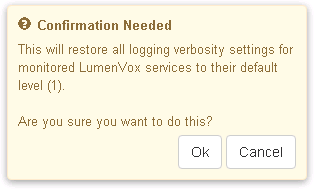
Note that if services are already running at default logging verbosity, selecting this option will have no effect.
 |
Send Report To LumenVox
|
Selecting this option allows users to send diagnostic configuration reports to LumenVox
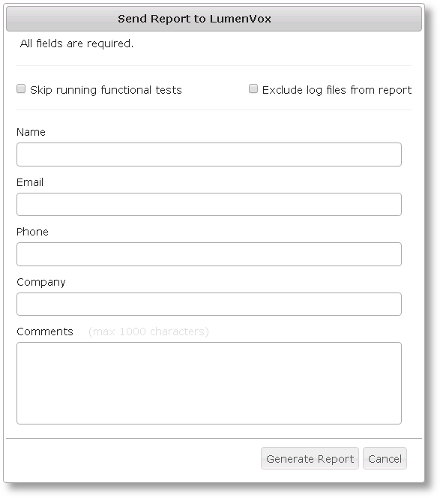
There are two check-box options shown at the top of the dialog here
The first option, allows users to optionally skip running functional tests, if they have not already been run. We do not recommend selecting this option, but it is available if running the functional tests is not desired for some reason. If the functional tests have already been run, and the results are already indicated in the Report Summary, then this option is not shown.
The second option allows users to omit sending log files in the report to LumenVox. By default, a compressed collection of the current log files will be included in the report, which often helps LumenVox engineers determine the root cause of issues being reported.
Following these options, there are fields available on the form to enter your contact information as well as a Comments section, where you should include a summary of why you are sending this report to LumenVox - please try to be as clear as possible, with as much detail as you can in this Comments field, so that your report can be processed without delay by the correct department. Also, please indicate good email and phone numbers, allowing the LumenVox Support Team to reach out to you for more information if needed. If you have a contact preference, please indicate this in the Comments field.
Once you have filled in the details of this form, click the Generate Report button to begin sending the report. Note that if necessary, diagnostic tests will be performed prior to compressing the log files and sending the report to LumenVox.
After the report has been compressed and generated, according to the selected options, this report will be sent to LumenVox (ftp.lumenvox.com) using secure FTP (ftps) protocol utilizing port 990. You should permit traffic going to this port through any firewalls so that the report can be sent. If there is some reason that this is not permitted, you have the option of sending the report to disk and later sending this to LumenVox as needed - you may need to contact LumenVox Support in order to permit this manual transfer. They will provide specific instructions for doing this when you contact them.
 |
Send Report To Disk
|
The last of the System Diagnostics controls options is to Send Report to Disk. This option is similar to Send Report To LumenVox, except that the report will be saved to a compressed file on disk instead.
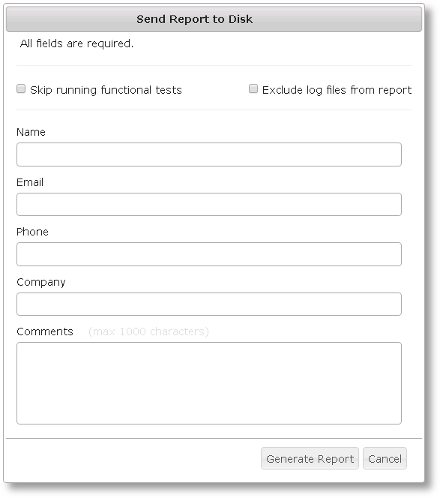
Once again, you should fill in the necessary contact and comment information as you would the Send Report To LumenVox, since this information will be stored in the compressed report. See the Send Report To LumenVox section above for details of other options.
After you click the Generate Report button, diagnostic tests will be performed if needed, as well as compressing of log files if needed to produce the compressed report file. Once ready, you will be asked to select a location on disk where this file will be saved.
Note that depending on the number of log files that are being included, this compressed report may take some time to compress and may also be quite sizable.
After the report has been generated and saved to disk, you can coordinate with LumenVox Support staff to send this using alternate transport methods as needed, if you are unable to use the Send Report To LumenVox option.
Also, if you are ever curious about the contents of these reports being sent to LumenVox during the "Send Report To LumenVox" option, the report file saved to disk with this option is identical, and you may open this to view the contents using a corresponding compressed file viewing tool of your choice.