Deprecated: Legacy (On-Premise) Licensing
As of the summer of 2016, all Legacy Licensing was deprecated. All users are now advised to use the Flexible Licensing model.
A deployment is a group of one or more on-premise (formerly "perpetual") licenses that is hosted by a single License Server.
Deployments are used to separate a group of licenses from a single purchase into discrete groups that can be placed onto a single machine. For example, if you purchase 100 ASR licenses that you intend on splitting between two customers, and each customer would have their own on-premise license server, you would need to create two Deployments; one for each customer.
*Note that Deployments only apply to on-premise licenses. As of version 12, we offer licenses via a Flexible license system. They also have separate instructions.
Before you can download any on-premise licenses, you must first create a deployment.
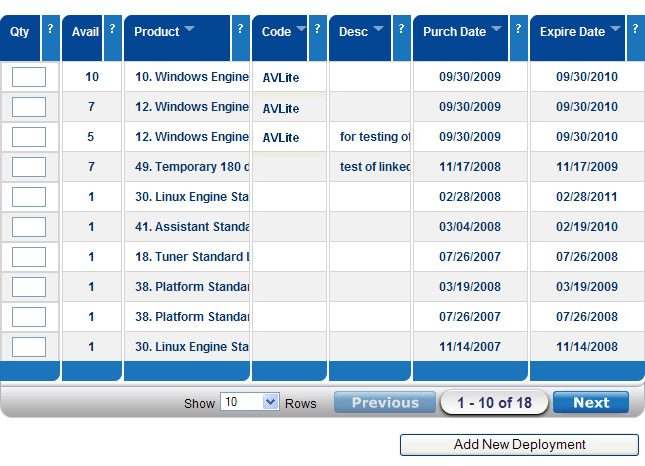
1. From the Main Menu page, select "View Licenses." This will show a summary of your purchased, deployed, and remaining licenses, as well as a detailed inventory of deployments and purchases.

2. To add a new deployment, whether in–house or for an end–user, click on "Add New Deployment."

3. You will need to enter a description or location for the deployment. This can be anything that will be helpful in identifying the deployment.
We usually recommend something that identifies the machine hosting the licenses (such as machine name or IP address) and/or something about the customer or licenses themselves (such as "50 ASR for XYZ Corp").
Choose yourself or an end–user account from the drop–down, the type of product you are deploying, and the quantity of product you are deploying. If you are deploying more than one type of product, just choose one of them for this first screen. You will have the opportunity to add more.
4. Once you have added the first product and the corresponding client information, click "Save."
5. You will be taken to the edit deployment screen. This is where you can add products or save the deployment as–is.
6. Once your deployment is saved, you or your end user can upload the licenses. This link is not to the actual product, just to the license. The product downloaded and installed separately.


